In this post we will walk through the steps needed to create something more complex. I was thinking of a block for the Rockwell Turbo-Encabulator. However Jason Moore has been waiting patiently for a Rockwell Power Flex 40 AC Drive block for over three months now. Oh well, I wasn’t sure how I was going to draw the six hydrocoptic marzlevanes anyway.
 Jason and I discussed using the parametric PLC symbols but decided it would change the look too much and be more work then necessary for this single block.
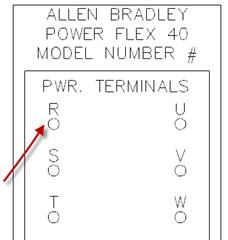
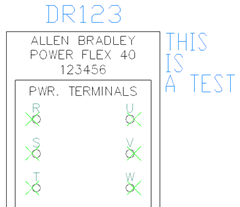
So here is our starting AutoCAD geometry (on the left). Currently it is all simple geometry and text. No blocks or attributes. It has already been broken into two halves so lets start with the top half by taking it into the Symbol Builder. 
Start the Symbol Builder command.  Select the geometry from for the top of the drive. I choose the left quadrant of the “R” terminal as my insertion point. That should make it easier to place into exiting wires rather than using the upper most corner of the block as the insertion point.
STOP! If your confused by this point, you need to stop reading this post and go read this one first…. The Basics Of Creating A Block I do not plan to show the basics of each dialog again in this post. Instead I want to focus on little tips and tricks that can be applied here to help make the end users job easier.
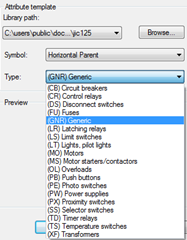
Since drives (DR) do not have a standard attribute template simply use the generic (GNR) one. That should be all that’s needed before pressing OK and moving into the Block Editor environment.

Placing The Attributes
I plan to start at the top of this block and work down. First thing is to place the needed attributes. Below you can see TAG1 and the DESC attributes have already been placed. I went into the properties palette to modify the justification of the DESC attributes. To make the MODEL NUMBER text always display the catalog number, use the Convert Text option.

However after converting the text be sure to remove the default value (See image below). Anytime text is converted the original text becomes the attributes default value. Most of the time this needs to be modified or removed. In this case I’ll remove the entire value. Also the CAT attribute is invisible by default. In this case we want it to display. Using the Properties palette toggle Invisible to No.

Before we move on away from the attributes, be sure to set the default FAMILY attribute to DR. This will make sure the catalog defaults to the Drives (DR) table.

Placing Wire Connections
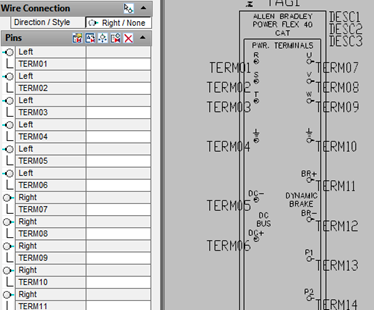
Next we place the wire connections. From the image on the right, you can see I placed all of the terminals on the left and then, after switching direction, placed all of the right connections.
Since these terminals all seem to have standard letters/numbers, lets make the terminals take on those as defaults. Select each terminal’s attribute in the palette and then choose Convert Text, then select the proper terminals id. This copies the location and formatting of the original text. Pretty cool!


 For the ground terminal, since I can’t use a symbol, I chose to use GND and simply make the attribute invisible.

Finish up the rest of the terminals.
Dynamic Clean Up
That takes us down to the DIP switches. Since this symbol will be for multiple drives, lets make these switches actually functional using a Dynamic Flip function. More than likely you have closed the Block Authoring palette by now. It can be opened again  from the Block Editor tab. For the switches the Flip parameter
  makes the most sense. If you are unfamiliar with Dynamic Blocks a Flip is a good place to start. Simply follow the prompts. In this case the Flip Parameter is setting the mirror line for the flip/mirror. Once the Parameter has been placed, I used the move command and moved it off to the side a bit. Just be sure to not move the the Parameter up or down because doing so would change the mirror line for the Flip Action.

 After placing a Parameter, its time to place an Action. Switch to the Action tab on the Block Authoring palette and choose the Flip
  Action. Actions always start with selecting what Parameter the Action is to be associated with. So select the Flip Parameter and then select the geometry that is to flip. Then right click to continue. Done.
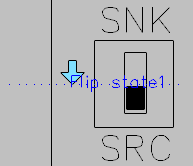
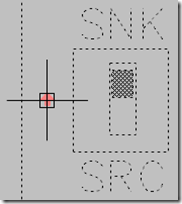
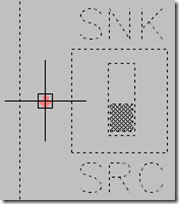
Dynamic additions to bocks are so easy and add so much functionality. Do the same to the switch on the other side. Anytime your working with Dynamic Blocks, its good to test the Parameters/Actions before before leaving the Block Editor environment. There is a handy tool on the Block Editor tab  that does just that. Inside the test environment, select the block to display the dynamic handles. Note the Flip arrows. If you placed the Parameters and Actions properly the switches should change position by simply clicking the Flip arrows.


To leave the test environment press the Close Test Block Window button.
 That should finish up this block. We added the needed attributes, wire connections, and ended with a little Dynamic Block action.
Exit the Block Editor environment using the Done button on the Symbol Builder tab. Since we chose Generic as the type at the start of this process, be sure to change the Symbol name drop down to Drives. That will update the block name to DR. Also modify the Unique identifier as well. Be sure to verify, and change if necessary, the icon and symbol save paths. 
Then place the symbol and verify the attributes and wire connections work as expected. On the right is my test symbol. The catalog attribute is working as well as the wire connection points.
If all is well, add the symbol to the Icon Menu.
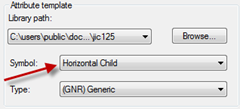
But that’s not all. That was only the top half. Lets start the process over for the bottom half of the drive symbol. The only difference between the two pieces of this block, is setting the bottom half as a child. How you do that is easy. Simply choose the Horizontal Child attribute template before entering the Block Editor environment.

Place the attributes, wire connections, and add some more flip actions to the bottom half of the drive and we’re done. I chose the same Unique identifier keeping the two block names the same except for the fourth character. Parents fourth digit are a 1 and children are 2’s. 
Place and test the child block. Link it to its parent and the relationship should be established and the parent attribute values should carry across.
 I hope this post demonstrates how easy it is to turn any existing AutoCAD geometry into intelligent AutoCAD Electrical symbols.
I have recorded the entire process I used making these blocks and it will eventually be posted to IMAGINiT’s YouTube channel. I’ll post a direct link here as well once its up.


